 English
 عربى
عربى Español
Surgical curettes are essential tools in various medical fields, from dermatology to gynecology. These instruments are designed for scraping or debriding tissue from a specific anatomical site. Proper technique is critical for ensuring patient safety and achieving desired surgical outcomes. This guide provides a professional overview of how to use a surgical curette effectively.
Understanding the Instrument
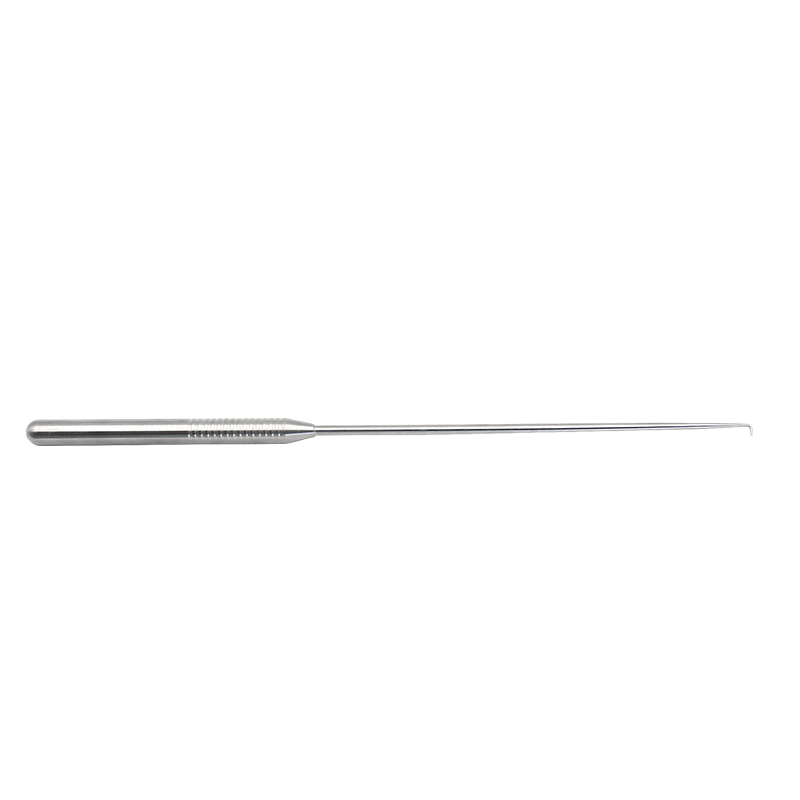
Before using a curette, it's vital to understand its design and purpose. A surgical curette typically consists of three parts:
-
Handle: Provides the surgeon with a secure grip.
-
Shaft: Connects the handle to the working end.
-
Blade (or Loop): The functional part of the instrument, designed for scraping. It can be sharp, blunt, spoon-shaped, or have a specific loop design.
Curettes come in various sizes and shapes, each suited for a particular purpose. For example, a dermatological curette is often used for removing superficial skin lesions, while a uterine curette is designed for use within the uterine cavity. Selecting the correct size and type of curette for the procedure is the first and most critical step.
Step-by-Step Technique
The technique for using a surgical curette is based on a controlled, methodical approach. While the specifics may vary by procedure, the fundamental principles remain the same.
Step 1: Patient and Site Preparation
Ensure the surgical site is properly sterilized and anesthetized. The patient should be positioned comfortably and the area draped appropriately to maintain a sterile field.
Step 2: Correct Grip
Hold the curette with a pen grip or a similar tripod grip for maximum control and precision. This grip prevents slipping and allows for fine, controlled movements. Avoid a palmar grip, which provides less dexterity.
Step 3: Initial Placement
Gently place the edge of the curette's blade or loop against the tissue you intend to remove. For procedures like the removal of a skin lesion, place the curette at the edge of the lesion.
Step 4: The Scraping Motion
Apply gentle, consistent pressure and move the curette in one direction, away from the healthy tissue. The motion should be a single, sweeping stroke rather than a back-and-forth sawing motion. The goal is to separate the diseased or unwanted tissue from the healthy tissue underneath. The scraping sound and feel of the curette against the tissue provide tactile feedback to the surgeon, indicating when the diseased tissue is fully removed and the firm, healthy base is reached.
Step 5: Inspecting the Site
After the scraping is complete, carefully inspect the surgical site. A proper curettage will leave a clean, smooth, and firm base. If any remnants of the diseased tissue remain, you may need to perform another, carefully targeted scrape.
Step 6: Hemostasis and Wound Care
Once the procedure is complete, apply pressure or use a cautery device to achieve hemostasis (stop bleeding). The wound is then dressed or closed as per standard post-surgical protocol.
Key Considerations for Professional Use
-
Sterilization: All reusable curettes must be properly sterilized before and after each use to prevent infection.
-
Tactile Feedback: A skilled surgeon relies heavily on the tactile feedback from the curette. The change in texture from soft, diseased tissue to a firmer, healthy base is the primary signal that the procedure is complete.
-
Patient Anatomy: Always be acutely aware of the underlying anatomy. For procedures on the skin, avoid scraping too deeply to prevent scarring. For internal procedures, be mindful of surrounding organs and structures to prevent perforation or damage.
-
Documentation: As with all surgical procedures, thoroughly document the procedure, including the type of curette used, the tissue removed, and the patient's response.
By mastering these techniques and understanding the nuances of the instrument, medical professionals can use surgical curettes with confidence and precision, leading to successful patient outcomes.


")